Salesforce provides Lightning Email Templates that make it easy to create clean, visually appealing emails. Instead of plain text, you can add details directly from your Salesforce records. You can merge data into your emails for sales messages, renewals, or case updates.
The email builder is simple to use and offers many Salesforce functions, such as email alerts, Flows, and Approval Processes. It is designed with modern email practices in mind and replaces the older Salesforce Classic Email Templates. You can also find it in other Salesforce tools, such as Account Engagement (formerly Pardot).
With Lightning Email Templates, every email looks good and includes the information needed to build strong customer connections.
🔐 Step 1: Create a Custom Permission Set for the Email Template Builder
Before using the Lightning Email Template Builder, you need to grant access through a custom permission set.
Here’s how to do it:
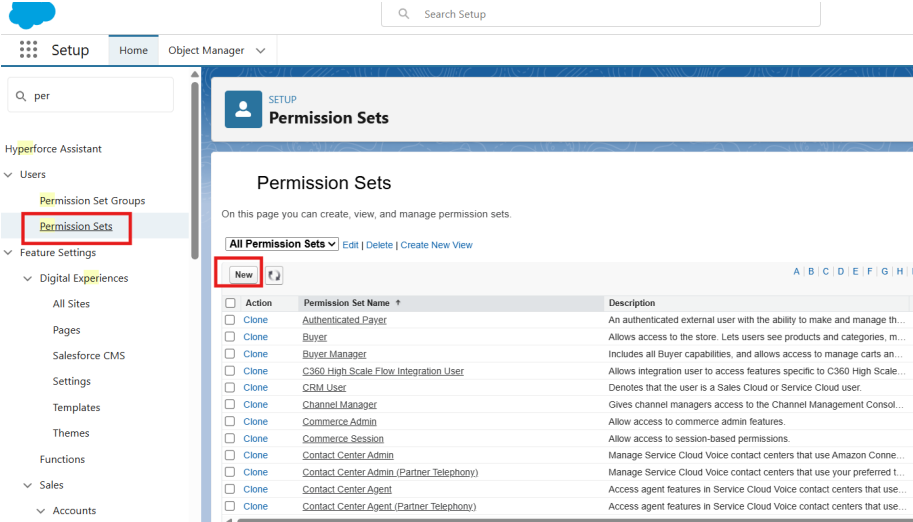
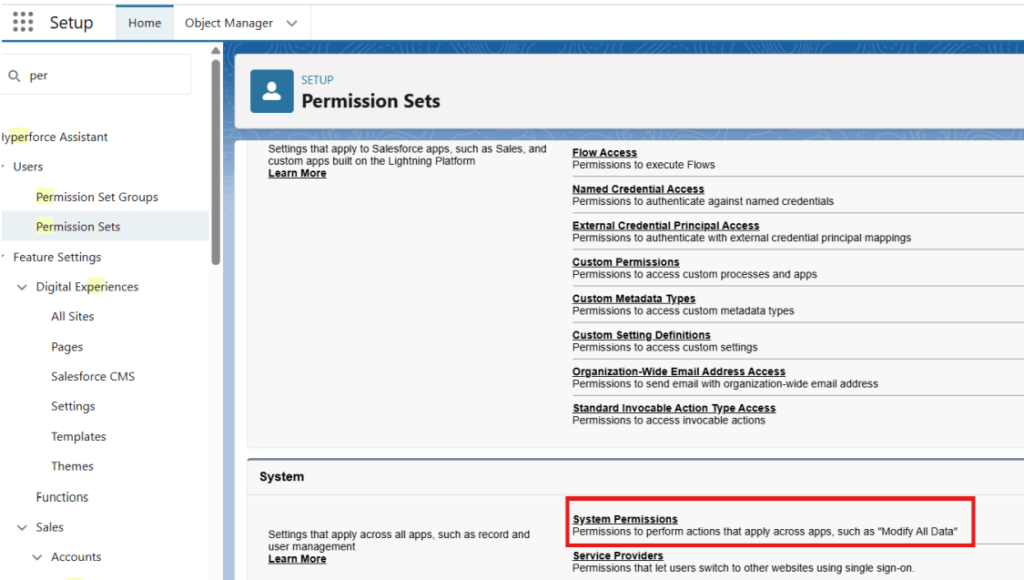
- Go to Setup.
- In the Quick Find box, type Permission Sets and click on it.
- Click the New button.
- Enter a Label like Template Builder Permission.
- Click Save.

Enable the Builder Permission
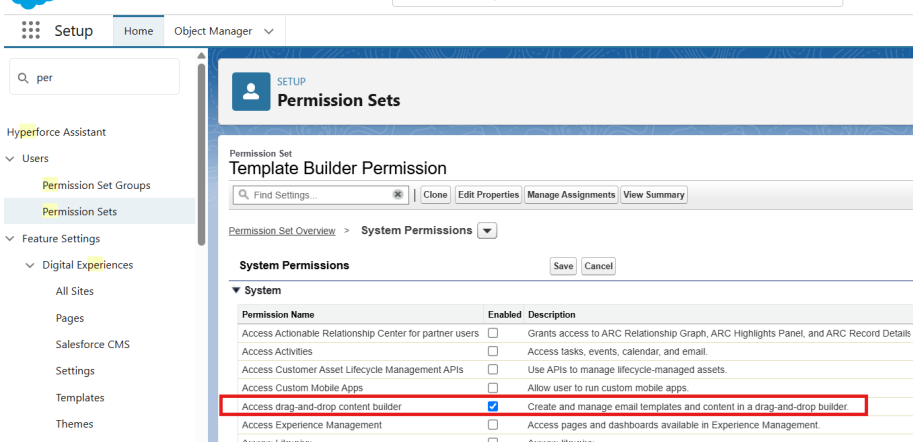
- Open the newly created permission set.
- Click on System Permissions under the permission set details.
- Click Edit.
- Find and check Access drag-and-drop content builder.
- Click Save.
Assign the Permission Set to Users
- At the top of the permission set page, click Manage Assignments.
- Click Add Assignments.
- Select the user(s) who will be building templates.
- Click Next, then Assign.
Your users now have the ability to create beautiful Lightning Email Templates!
✉️ Step 2: Create a Lightning Email Template
Now that permissions are sorted, let’s build the actual email template.
- Click the App Launcher (grid icon in the top-left).
- Type Email Templates and select it.
- Click on the New Email Template button.
- Enter the following details:
- Email Template Name
- Related Entity Type (e.g., Contact, Case, Lead)
- Subject
- Click Save.
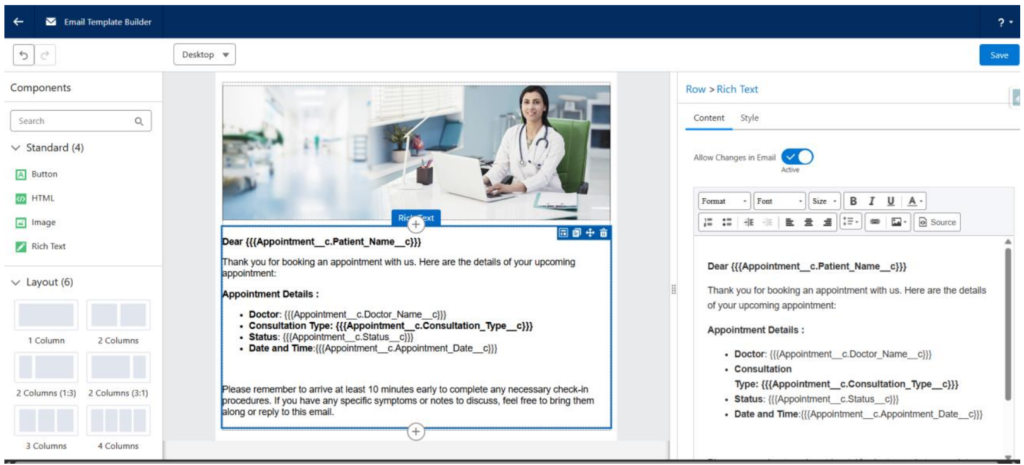
Once saved, click Edit in Builder to open the drag-and-drop editor. Here, you can:
- Add images
- Format text
- Insert buttons
- Personalize content with merge fields
Design your email to match your brand—this is what your users or customers will see!


📧 Step 3: Create an Email Alert
With the email template ready, it’s time to create an Email Alert—this connects your Flow to the email.
- Go to Setup.
- Type Email Alerts in the Quick Find box and open it.
- Click New Email Alert.
- Fill in:
- Description and Unique Name
- Object (the object that triggers the email)
- Email Template (select the one you just created)
- Under Recipient Type, select Email Field.
- Choose the email field(s) to receive the alert and move them to Selected Recipients.
- Click Save.
Now you’ve got a powerful email alert ready to be used in a Flow!

🔄 Step 4: Trigger the Email Alert in a Flow
This is where the magic happens—automating your emails using Salesforce Flows.
- In Setup, type Flows and go to the Flows page.
- Click New Flow and choose a type (e.g., Record-Triggered Flow or Scheduled Flow) based on your needs.
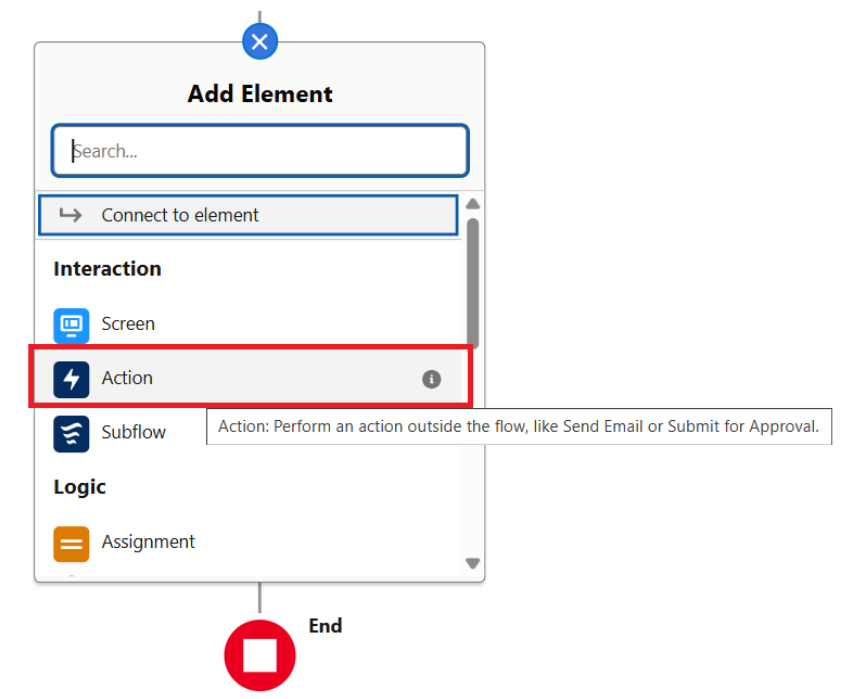
- Add an Action Element where you want the email to be sent.
- In the Action search, type Email Alert and select the one you created earlier.
- Configure any necessary inputs (like record ID).
- Finish building your Flow, then click Save and Activate.
Also Read:Daily Allocations for Email Alerts
Integrating Lightning Email Templates with Salesforce Flows improves email communication. Set up permissions, create a simple template, and connect it to a Flow so you can automatically send personalized emails that keep your customers engaged while saving time.