
In any Salesforce setup, it’s common for essential information to go unnoticed among multiple fields. Conditional Field Formatting helps you make specific field values stand out visually — using icons, colors, or styled text — directly within Lightning App Builder. This means you no longer need to rely on extra formula fields or static images to get the same effect.
Below is a clear explanation of what this feature does, why it’s helpful, and how you can apply it correctly.
What Does Conditional Field Formatting Do??
Conditional Field Formatting allows you to apply visual styling to a field whenever certain conditions are met. For example, you can display an icon or change the text color when a field’s value equals something specific.
Before this feature existed, administrators would build formula fields referencing images saved in Static Resources. While that worked, it often made maintenance more complicated. This built-in approach keeps your configuration simple and easier to manage.
Example 1: Prioritizing Cases for Support Teams
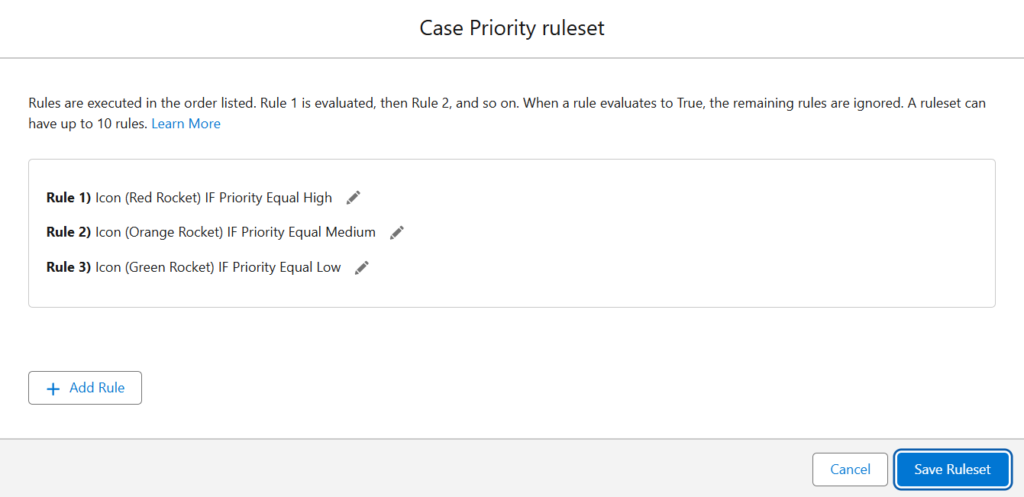
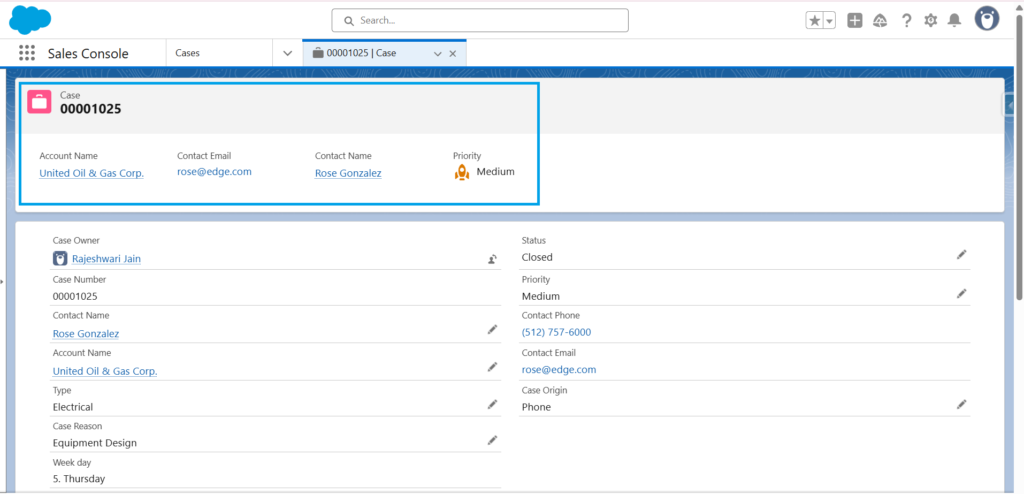
In a service environment, agents often need to spot high-priority cases at once. You can apply Conditional Field Formatting to the *Priority* field to do just that:
- If Priority is High, show Red icon.
- If Priority is Medium, show the Yellow icon.
- If Priority is Low, show the Green icon.
This setup means agents can respond to critical issues more efficiently.
Example 1: Making Account Ratings Visible
Imagine you need your sales team to quickly see whether an account is promising or not. You can format the Account Rating field like this:
- If the rating is Cold, show a red icon.
- If the rating is Warm, show an orange icon.
- If the rating is Hot, display a green icon.
With this in place, sales users can prioritise accounts without reading through the full details.
Why Use It?
When set up well, this feature supports your team by:
- Highlighting important records instantly
- Helping users take the right action quickly
- Avoiding extra custom fields and images
How to Set Up Conditional Field Formatting?
Check Prerequisites Are Met
- Dynamic Forms must be active on the object you’re working with.
- To highlight fields in the page header, use the Dynamic Highlight Panel.
- If your team uses mobile, ensure Dynamic Forms is also enabled for mobile pages.
Create the Ruleset
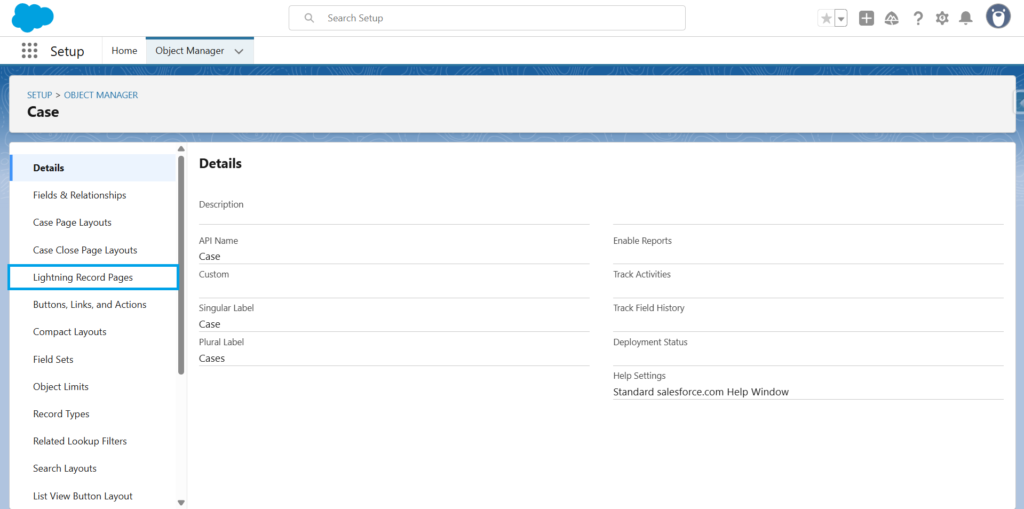
- Open Setup, go to Object Manager, and pick your object.
- Select Lightning Record Pages, choose the one you want, and click Edit.
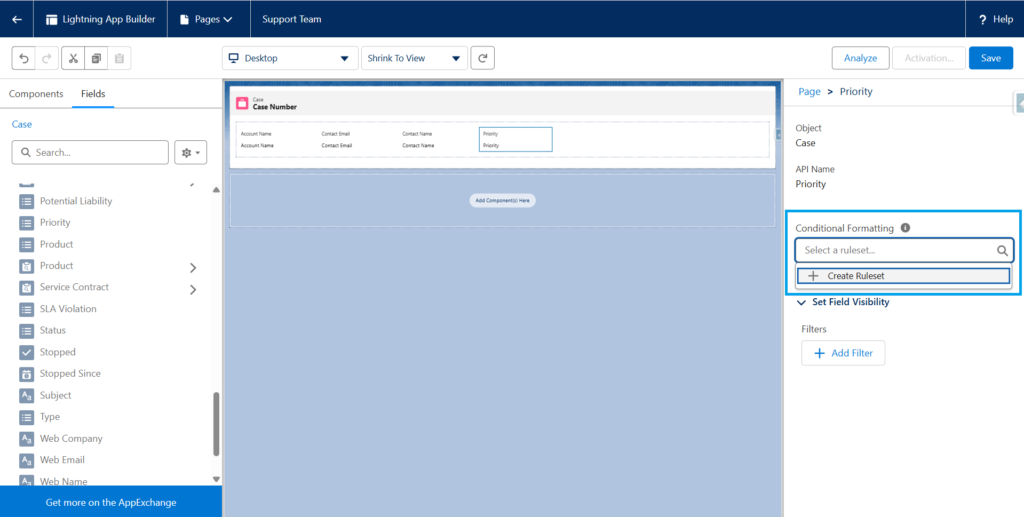
- Click the field you want to format.
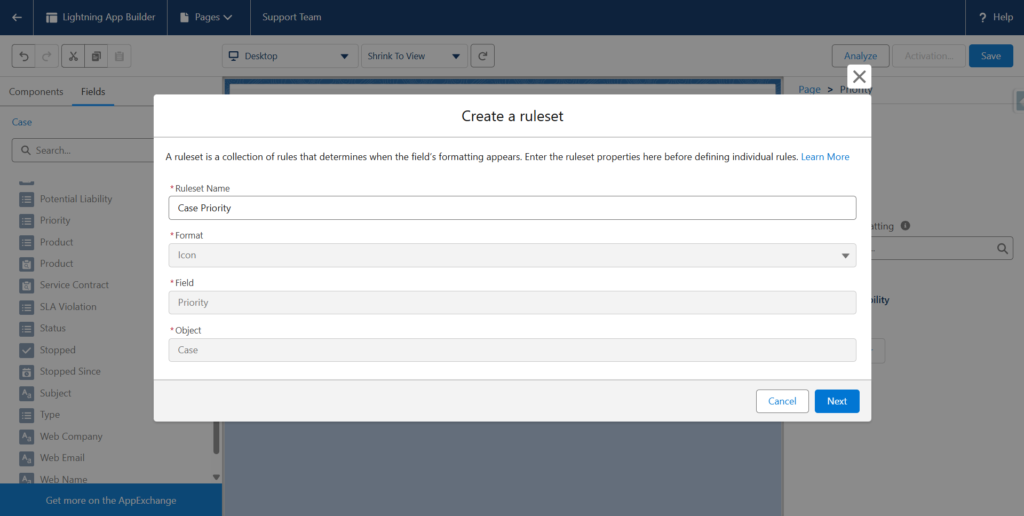
- On the right, find Conditional Formatting and click Create Ruleset. Give it a name that’s easy to recognise, then continue.
Define Conditions
Add each condition and choose how you want the field to appear:
- Select the field, set the operator and value.
- Pick the icon and colour combination that should appear.
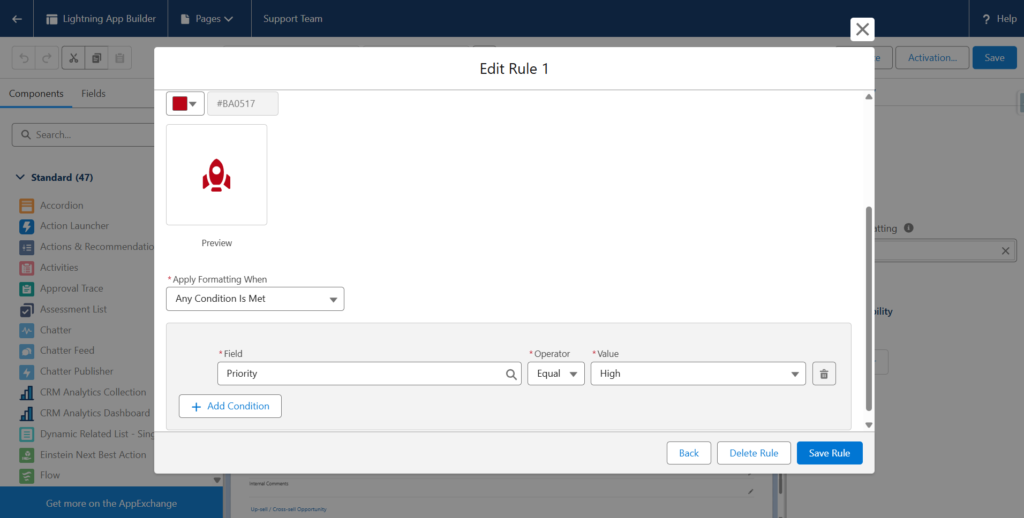
- Add as many rules as needed — but remember that once one condition matches, the rest are ignored for that field.
Save and Activate
Once all rules are ready, save the Ruleset and activate the Lightning Record Page so the changes appear for users.
To delete a Ruleset
- Go to Setup → Object Manager → Object → Conditional Field Formatting.
- Find the Ruleset you want to remove.
- Use the dropdown to select Delete and confirm.
Good to Know
- One field can have only one Ruleset, but each Ruleset can include several conditions.
- Only standard Salesforce icons can be used — custom images aren’t supported.
- If you deploy the Ruleset to another org, remember to include it in your Change Set.
- Rules can reference values from other fields, too.
Conclusion
Conditional Field Formatting makes it easier for your teams to notice the information that matters most. It reduces time spent searching through records and helps everyone act on the correct data quickly. Start with a clear use case, like Account Rating or Case Priority, to see how much it can help.