Learn how to send custom notifications in Salesforce using Flow. Follow this step-by-step guide to create, configure, and automate notifications for better user engagement.
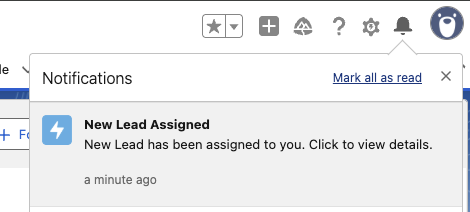
Timely alerts can transform how quickly your sales teams respond to new opportunities. In Salesforce Lightning Experience, in-app custom notifications — the ones you see under the bell icon — are a fast, non-intrusive way to keep users informed without flooding their inbox.
In this blog, we’ll see how to use Flow to send a bell notification to the Lead Owner the moment a new lead is assigned to them.
Why Use Flow for Notifications?
Automation without code – No Apex needed.
Customizable triggers – Send alerts only when conditions match your business rules.
Multi-channel ready – Works for in-app, mobile push, or both.
What We’ll Build
When a Lead record is created and assigned to a user, that user will instantly receive an in-app bell notification in Salesforce Lightning.
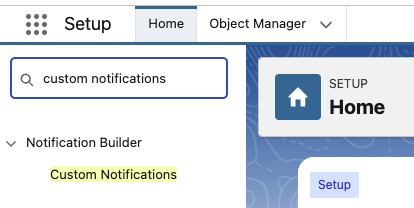
Step 1: Create a Custom Notification Type
Before Flow can send notifications, we need to define the notification “template.”
1.Go to Setup → search Custom Notifications.
2. Click New.
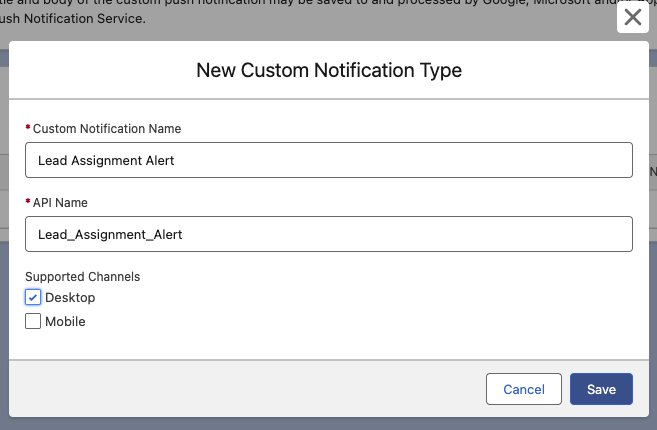
Name: Lead Assignment Alert.
API Name: Lead_Assignment_Alert.
Channels: Select Desktop (and Mobile if needed).
Click Save.
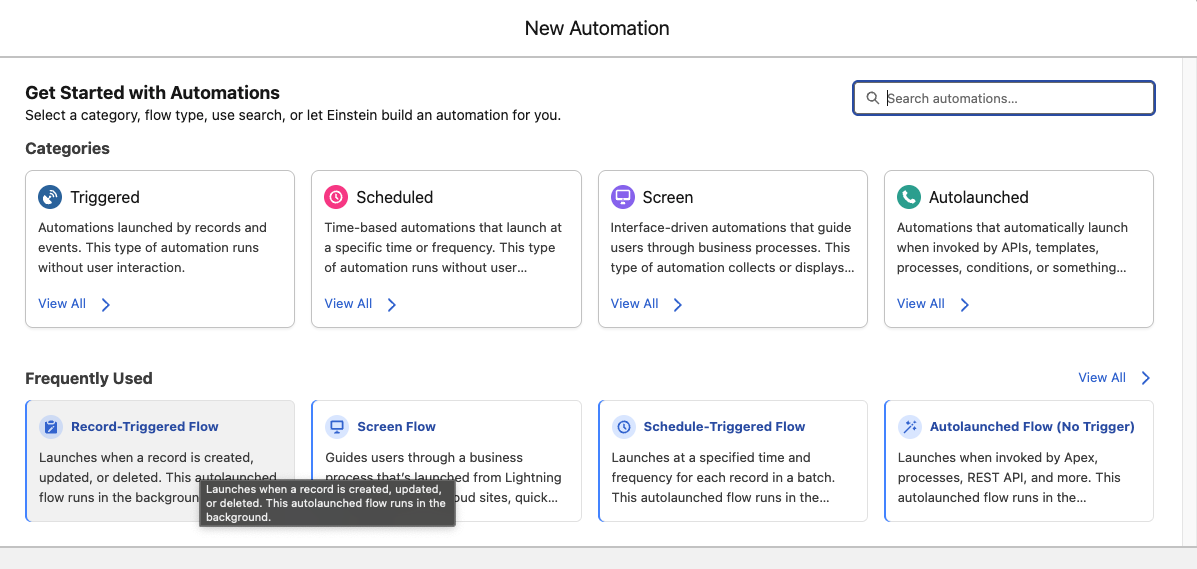
Step 2: Build the Flow
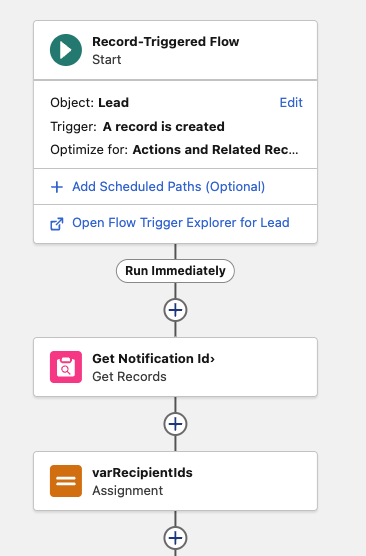
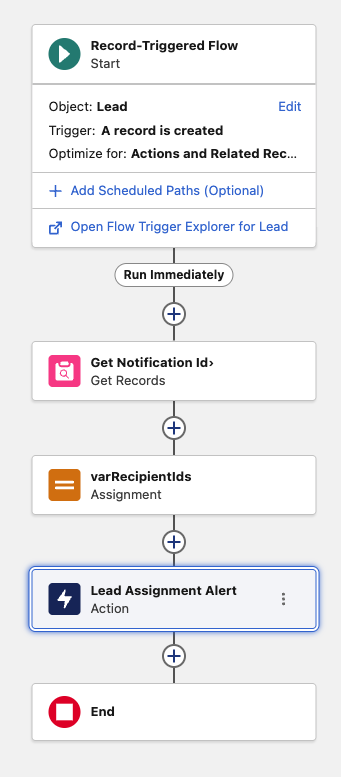
We’ll create a Record-Triggered Flow.
1.Setup → Search Flows → Click New Flow.
2. Select Record-Triggered Flow.
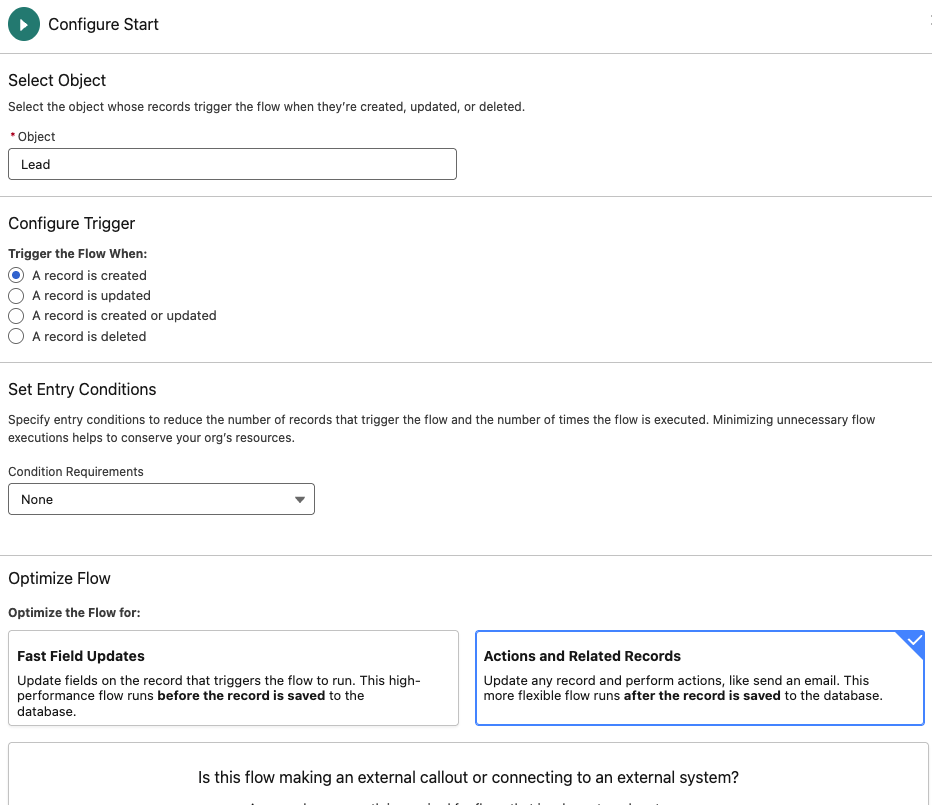
3.Object: Lead.
4.Trigger When a record is created
5.Entry condition:
You can set this based on your needs.
Example: Trigger only when the Lead is assigned to a user, or when Status = “Open – New.”
In this blog, we’ll keep it None so it runs every time a Lead is created — you can add filters later to target specific scenarios
6.Optimize for Actions and Related Records
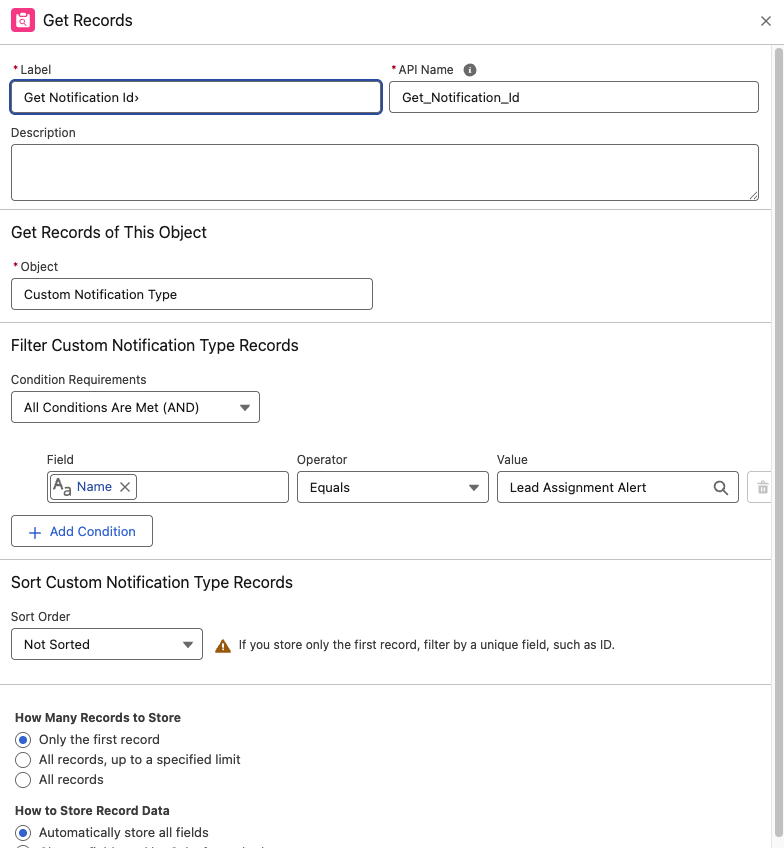
Step 3: Get the Notification Type Id
The “Send Custom Notification” action requires the Notification Type Id. We’ll fetch it from the CustomNotificationType object.
1.Add a Get Records element:
Object: CustomNotificationType
Filter: Name Equals Lead Assignment Alert (or API Name if you prefer).
Store Only the first record.
Automatically store all fields.
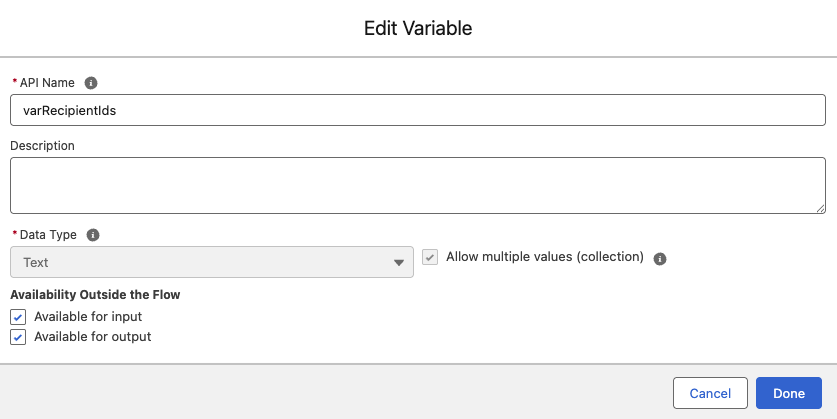
Step 4: Create a Text Collection for Recipient IDs
Recipient IDs must be passed as a Text Collection.
1.Create a Variable:
API Name: varRecipientIds
Data Type: Text
Allow multiple values (Collection): ✅ Checked.
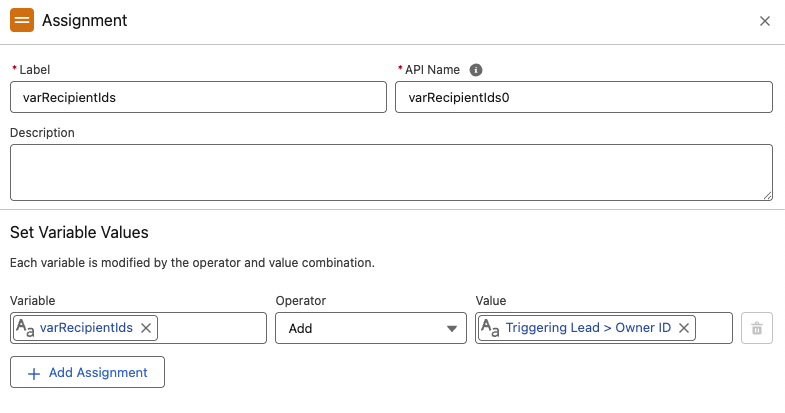
2. Add an Assignment element:
Variable: varRecipientIds
Operator: Add
Value: {$Record.OwnerId}.
After adding flow will look like this
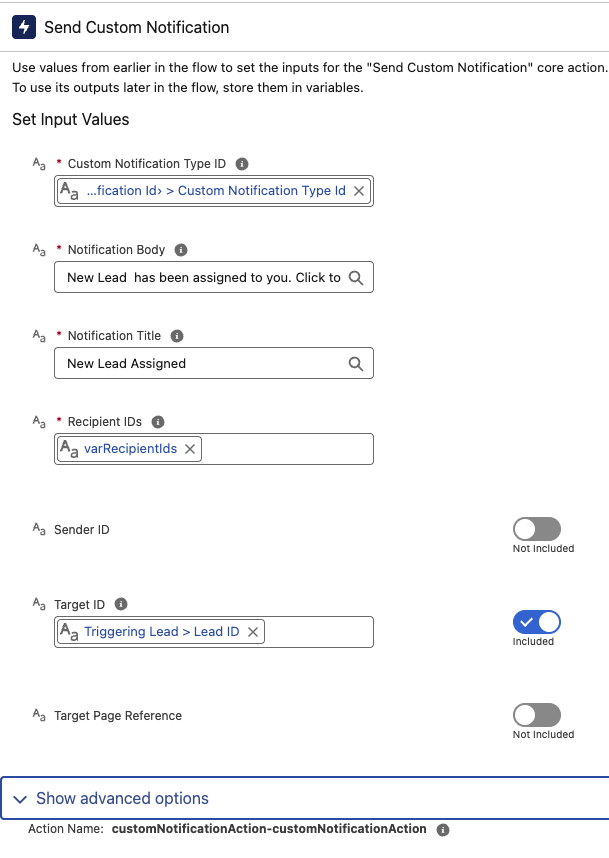
Step 5: Add the “Send Custom Notification” Action
Add an Action element → Search for Send Custom Notification.
Custom Notification Type ID: from Get Notification Id → CustomNotificationType Id.
Notification Title: New Lead Assigned.
Notification Body: Lead has been assigned to you. Click to view details.
Recipient IDs: varRecipientIds.
Target ID: {$Record.Id}(makes the notification clickable to the Lead record).
Step 6: Save, Activate, and Test
Save the Flow as Lead Assignment Notification Flow.
Activate it.
Test by creating a Lead in Lightning Experience.
The Lead Owner should see a bell icon notification instantly.
Best Practices
Avoid spam – Add conditions (e.g., Status = “Open – New”) so users only get relevant alerts.
Make it actionable – Always link to the record in Target ID.
Personalize – Use merge fields like {!$Record.Company} or {!$Record.LeadSource}.
Rajeshwari Jain is a Technical Support Specialist and Content Writer. She applies her practical experience to assist trailblazers and create articles on how to make things easy in Salesforce to improve and increase efficiency.
In her free time, she enjoys reading tech blogs and experimenting with new tools.
One of the long awaited enhancements coming with Salesforce Spring ’26 release for Flow Builders is Custom Styling for Screen Flows.Screen Flows have always looked nice, but their designs were
Problem StatementIn Salesforce Service Cloud, when using Email-to-Case, there may be a need to prevent users from replying to or CC'ing certain email addresses — for example, internal loopbacks, external systems, or deprecated
Your friend got a Salesforce job. Your boss keeps mentioning it. LinkedIn won't stop showing you posts about Salesforce careers.And you're sitting there like — okay but what is it
For any Salesforce developer, writing code is not enough – it's about writing quality code that is maintainable, secure, and high-performing.1. Use Out-of-the-Box Features Before Writing CodeSalesforce offers many ready-to-use