

setting it up can feel confusing. Is it a terminal tool? An app? A VS Code extension?
It’s all three. Claude Code is one tool that you can run three ways:
- In the terminal, the command-line version
- In the Claude desktop app, through the Code tab, with no terminal needed day to day
- In your IDE, as an extension for VS Code (and editors based on VS Code, like Cursor)
All three run on your computer and connect to Salesforce the same way, through the Salesforce CLI (sf). Once you connect the Salesforce CLI to your org, any of the three can use it.
Today we will covers the one-time Salesforce setup first, then each of the three options step by step. You only need one option, so pick the one that fits how you work
Which option should you pick?
| Option | Best for | What it feels like |
|---|---|---|
| A. Terminal | Comfortable with the command line | A chat inside your terminal window |
| B. Claude desktop app | Who want to avoid the terminal | A chat window, like regular Claude, that can work with files on your computer |
| C. VS Code extension | Who already use VS Code with Salesforce Extensions | A Claude panel next to your metadata files, with changes shown as side-by-side diffs |
Not sure? Start with Option B if you’ve never used a terminal, or Option C if you already have VS Code set up for Salesforce.
What you need
| Requirement | Why |
|---|---|
| A Claude Pro, Max, Team, or Enterprise plan (or an Anthropic Console account) | Claude Code needs one of these. The free plan doesn’t include it. |
| Node.js (LTS version) | Used to install the Salesforce CLI |
Salesforce CLI (sf) | Claude uses it to retrieve metadata, run queries, and deploy |
| A Salesforce sandbox/dev login | A safe place to test |
| Git (recommended) | Tracks changes to your metadata. Task 7 in the next post uses Git history. |
| VS Code | Only needed for Option C |
Part 1: Set Up the Salesforce Side (Do This Once)
Everyone completes this part, whichever option you choose.
Step 1: Install Node.js
Download the LTS version from nodejs.org and run the installer.
Test it. Open Terminal (Mac) or PowerShell (Windows) and run:
node --version

You should see a version number like v22.x.x.
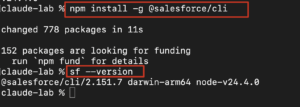
Step 2: Install the Salesforce CLI
npm install -g @salesforce/cli
Test it:
sf --version
You should see something like @salesforce/cli/2.x.x.
Step 3: Install Git (recommended)
- Mac: Run
git --version. If Git isn’t installed, macOS offers to install it for you. - Windows: Download Git for Windows from git-scm.com and install it with the default options.
Test it:
git --version
Step 4: Create a Salesforce DX project
Claude Code works inside a folder. A Salesforce DX project gives it the standard structure for retrieving and deploying metadata.
Move to the folder where you keep your work, for example your Documents folder:
cd ~/Documents
Create the project:
sf project generate --name claude-admin-lab
Move into it:
cd claude-admin-lab
Turn it into a Git repository so you can track changes:
git init
You now have a folder called claude-admin-lab with files like sfdx-project.json and a force-app folder.
Step 5: Log in to your sandbox
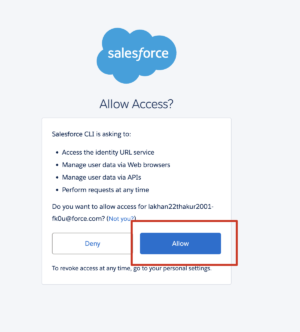
sf org login web --alias my-sandbox --instance-url https://test.salesforce.com
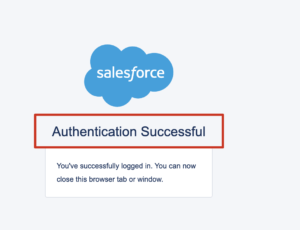
A browser window opens. Log in with your sandbox username (it usually ends in .sandboxname, for example admin@company.com.dev). When you see “Authentication successful,” you can close the browser tab.


Step 6: Make the sandbox the default org for this project
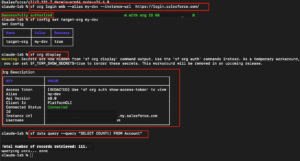
sf config set target-org my-sandbox
Step 7: Test the Salesforce connection
sf org display
You should see your sandbox username, instance URL, and a Connected Status of Connected.
Also try a quick query:
sf data query --query "SELECT COUNT() FROM Account"

Checkpoint: If both commands work, the Salesforce side is ready. Claude Code will use this same login in all three options.
Part 2: Choose Your Option
Option A: Claude Code in the Terminal
Step A1: Install Claude Code
Mac or Linux. Open Terminal and run:
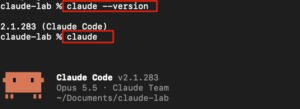
curl -fsSL https://claude.ai/install.sh | bash
Windows. Open PowerShell and run:
irm https://claude.ai/install.ps1 | iex
Alternative (any OS, if you already have Node.js):
npm install -g @anthropic-ai/claude-code
Test it:
claude --version
Step A2: Open your project folder
cd ~/Documents/claude-admin-lab
This step matters. Claude Code works with the folder you start it in. Start it in your DX project so it can see your metadata and your Salesforce CLI settings.
Step A3: Start Claude Code and log in
claude

The first time you run it:
- Claude Code asks you to choose a theme. Pick any.
- It asks how you want to log in. Choose your Claude account (Pro, Max, Team, or Enterprise) or an Anthropic Console account.
- A browser window opens. Approve the login.
- Back in the terminal, Claude Code may ask whether you trust the files in this folder. Choose Yes, since this is your own project.
You’ll now see a prompt where you can type messages to Claude.

Step A4: Run the connection test
Type this prompt and press Enter:
Claude shows you each command before running it and asks for approval. Choose Yes for each one.
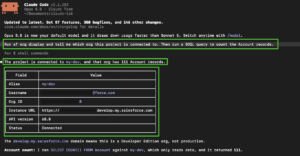
Checkpoint: Claude should report your sandbox username and an Account count. Compare the count with the one you got in Part 1, Step 7.
Useful terminal commands
| Command | What it does |
|---|---|
/help | Shows available commands |
/clear | Starts a fresh conversation |
/init | Creates a CLAUDE.md file describing your project (see Part 3) |
/mcp | Shows connected MCP servers |
Esc | Stops Claude mid-task |
Ctrl + C twice | Exits Claude Code |
Option B: Claude Code in the Claude Desktop App
With this option, you use Claude Code through a regular app window. You never type commands yourself. Claude runs them for you, with your approval.
Step B1: Install the Claude desktop app
- Go to claude.ai/download.
- Download the version for Mac or Windows.
- Install it and sign in with your Claude account.
Step B2: Open the Code tab
At the top of the app, you’ll see tabs for chat and Code. Click Code.
Step B3: Start a session in your project folder
- Start a new session.
- When the app asks which folder to use, select the
claude-admin-labfolder you created in Part 1 (for example,Documents/claude-admin-lab). - Pick the option to run the session locally on your computer, if the app asks.
Because the session runs on your computer, it uses the same Salesforce CLI login from Part 1. You don’t need to log in to Salesforce again.
Step B4: Run the connection test
Type the same prompt:
The app shows each command and asks for approval before running it. Approve them.
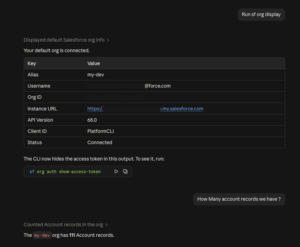
Checkpoint: You should see your sandbox username and the same Account count as in Part 1.
Troubleshooting for the desktop app
If Claude says sf: command not found, quit the Claude desktop app completely and reopen it. The app has to pick up the Salesforce CLI you just installed. On Mac, use Cmd + Q, not just closing the window.
Option C: Claude Code in VS Code
This option works well for admins who already use VS Code with Salesforce. Claude works in a panel next to your metadata files, and you can review each change as a side-by-side diff before accepting it.
Step C1: Install VS Code
Download it from code.visualstudio.com and install it.
Step C2: Install the Salesforce Extension Pack (recommended)
- In VS Code, click the Extensions icon in the left sidebar (four squares), or press
Cmd + Shift + X(Mac) orCtrl + Shift + X(Windows). - Search for Salesforce Extension Pack.
- Click Install on the one published by Salesforce.
You don’t strictly need this for Claude Code, but it adds Salesforce syntax highlighting, org browsing, and deploy/retrieve right-click menus. These make it much easier to review what Claude retrieves.
Step C3: Install the Claude Code extension
- In the Extensions panel, search for Claude Code.
- Click Install on the one published by Anthropic. Check the publisher name so you get the official extension.
- After it installs, you’ll see a Claude icon in the sidebar or the editor toolbar.

Step C4: Open your project folder
- Go to File → Open Folder.
- Select the
claude-admin-labfolder. - If VS Code asks whether you trust the authors of the files, choose Yes, I trust the authors.
You should see force-app, sfdx-project.json, and your other project files in the Explorer on the left.
Step C5: Open Claude Code and sign in
- Click the Claude icon.
- The first time, the extension asks you to sign in. Follow the prompts to log in with your Claude account in the browser.
- A Claude panel opens where you can type prompts.
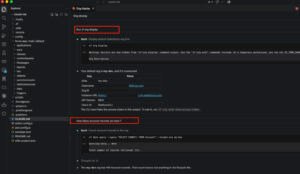
Step C6: Run the connection test
Type the same prompt:
Approve the commands when asked.
Checkpoint: You should see your sandbox username and the same Account count as in Part 1.
Why VS Code is handy for Salesforce work
- Side-by-side diffs: When Claude edits a Flow or validation rule file, VS Code shows the before and after. You accept or reject the change.
- Mention files: Type
@in the Claude panel to point Claude at a specific file, for example@force-app/main/default/objects/Opportunity. - Salesforce Extensions: Right-click a metadata file to deploy or retrieve it yourself, after reviewing Claude’s work.
Part 3: Add Guardrails Before Real Work
This part applies to all three options.
Step 1: Create a CLAUDE.md file
CLAUDE.md is a file in your project folder that Claude reads at the start of every session. Use it to set rules.
Create a file named CLAUDE.md in the claude-admin-lab folder with this content:
# Salesforce Admin Project
## Orgs
- Default org is the sandbox alias `my-sandbox`.
- Never target production unless I name the production alias in my prompt.
## Safety rules
- Never deploy without asking me first.
- Prefer `sf project deploy validate` (validation only) over real deployments.
- Never delete metadata or records. - Don't query sensitive fields (SSN, salary, health data, personal phone numbers) unless I ask.
## Output
- Save reports, CSV exports, and documentation to a `reports/` folder.
- Use Markdown tables for summaries.
You can also type /init in Claude Code to have Claude draft a starting CLAUDE.md for you, then add the rules above.
Step 2: Keep command approvals on
By default, Claude Code asks before running commands and editing files. Leave it that way while you learn. Before you approve anything, check for:
deploy(changes your org)delete(removes metadata or data)- A production alias in
--target-org
Step 3: Commit your starting point to Git
Before trying any tasks, save a clean starting point:
git add .
git commit -m "Initial Salesforce DX project"
If Claude changes something you don’t like, you can always return to this point. You can also ask Claude to run these commands for you.
Troubleshooting
| Problem | Fix |
|---|---|
sf: command not found | Reinstall the Salesforce CLI, then restart your terminal, the Claude desktop app, or VS Code |
claude: command not found | Close and reopen the terminal. If it still fails, reinstall Claude Code. |
| “No default org set” | Run sf config set target-org my-sandbox inside the project folder |
| Expired or invalid session | Log in again: sf org login web --alias my-sandbox --instance-url https://test.salesforce.com |
| Claude is connected to the wrong org | Run sf org list to see all orgs and which one is the default |
| Claude can’t see your files | Make sure you started Claude Code in, or opened, the claude-admin-lab folder |
| “Claude Code isn’t available on your plan” | Claude Code needs Pro, Max, Team, Enterprise, or a Console account |
Quick Recap
- Install Node.js, the Salesforce CLI, and Git.
- Create a DX project and log in to your sandbox.
- Pick one option: Terminal, Claude desktop app, or VS Code.
- Run the test prompt and confirm the org and Account count.
- Add a
CLAUDE.mdfile with safety rules and commit your starting point.